On-premise installer V2 for Linux: HOW TO (instruction for using)
Installation
Note. To pull docker images you'll have to enter credentials (login, password) from your CAM (Comodo Accounts Management) account (Link: https://accounts.comodo.com). So, be sure you have AEP not expired license to has access for pulling on-premise images.
-
Download installer and run it from root user:
                            curl -L -O http://get.on-premise.xcitium.com/installer2 && chmod +x installer2 && sudo
                            ./installer2
Note. If you run not from root and started setup, please stop installation. Than run it from root user and start setup from very beginning.
Configuration files will be stored to folder
/home/[SUDO_USER]/itsm(if it's possible to get SUDO_USER) or/root/itsm
-
Look to console output. There will be information for access to installation in browser:
- username (admin)
- password (always new, you don't need to save it)
- port
Open in browser:
http://{your_ip}:{port}/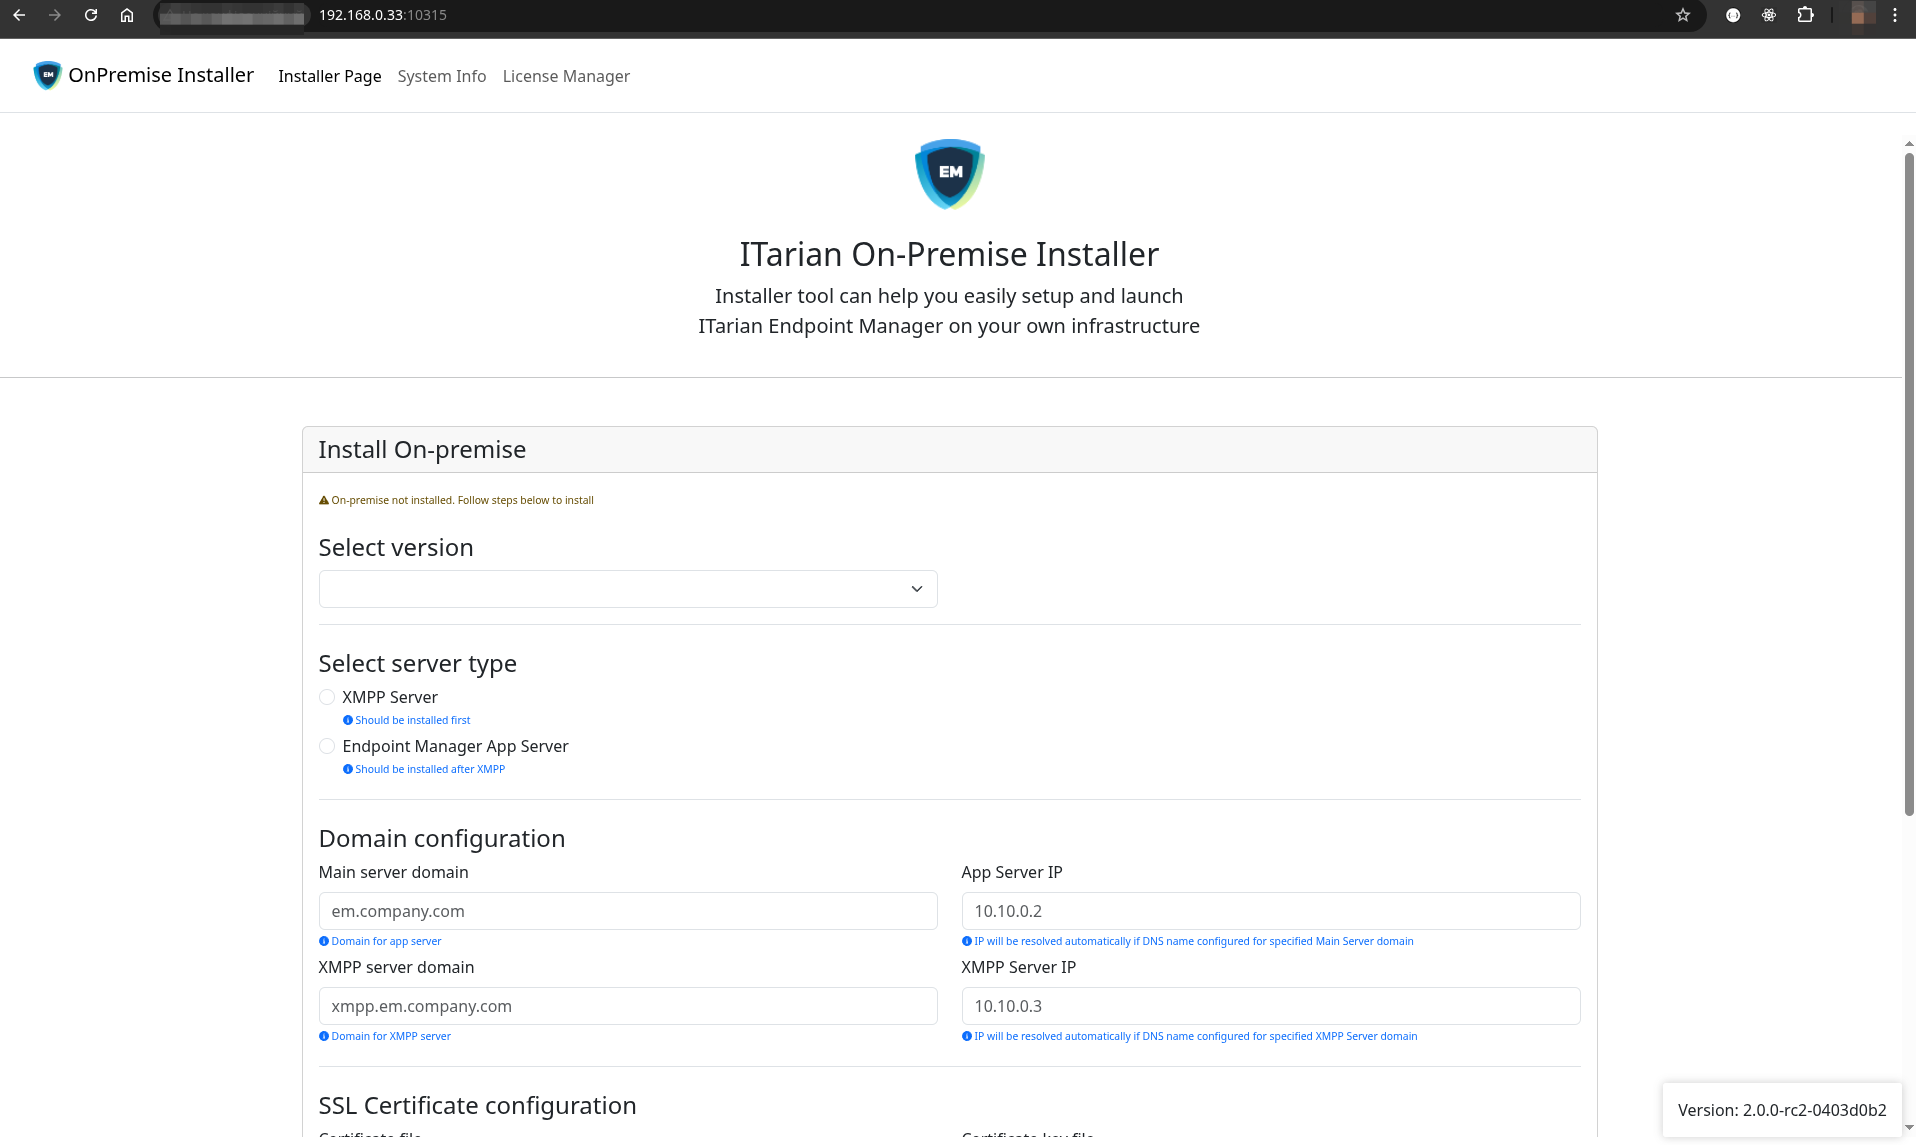
-
Check system requirements
You have to ensure that docker is installed in system before installation.
Installer provide convenient way to check system parameters and resolve several issues
Click on "System Info" in top-menu
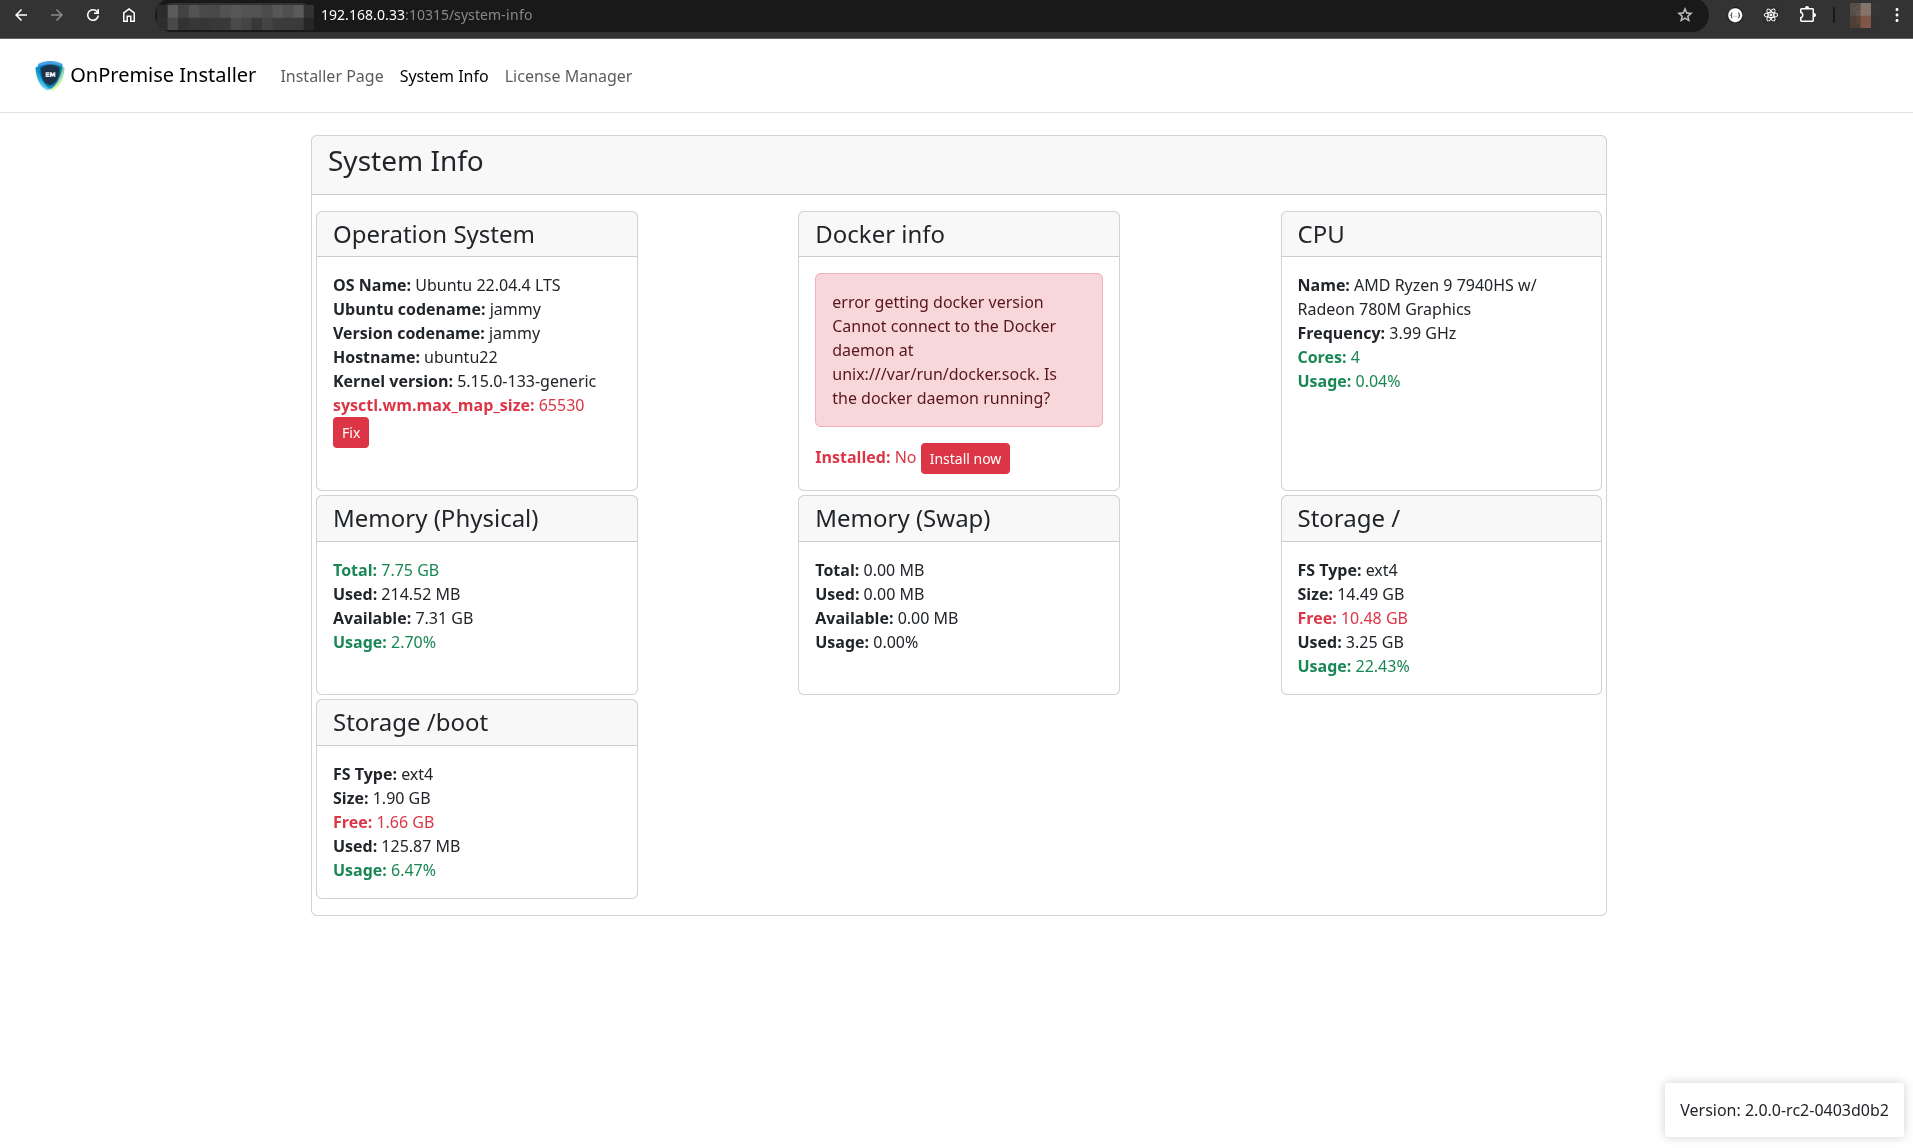
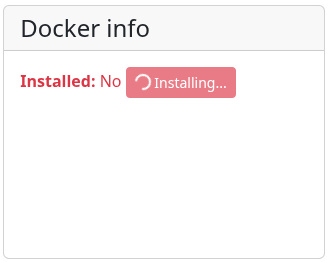
Check docker section. In case docker not installed - click Install now and wait until operation finished. It can take 5-10 minutes.
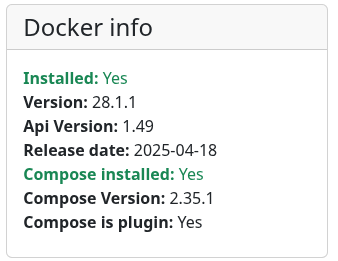
Once docker is installed. Docker compose menu item appeared in top-menu. It can be useful to verify installation process and to perform some troubleshooting if needed
Until on-premise server not installed this page can show errors. This is not critical
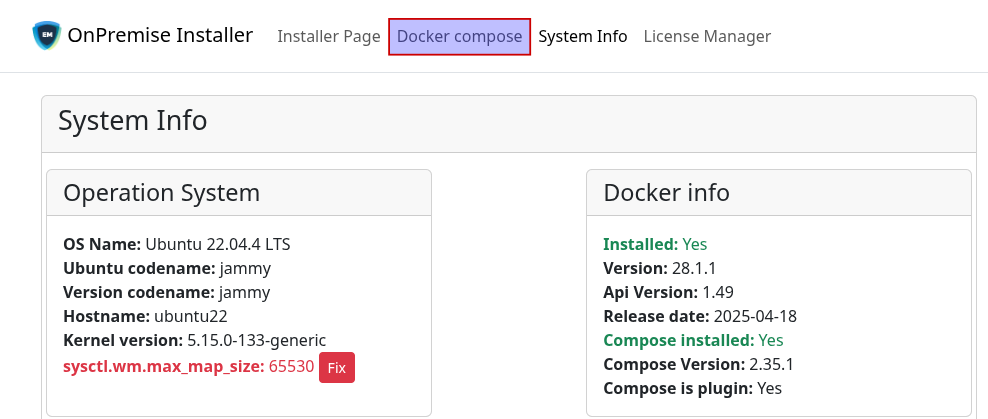
If you noticed issue with vm.max_map_size parameter - it can be resolved as well by clicking Fix button. This parameter is crucial for elasticsearch working, and it causes not working most of on-premise functions.
However, omitting this step is possible. Once you leave this unfixed - it can be done automatically during installation process.
-
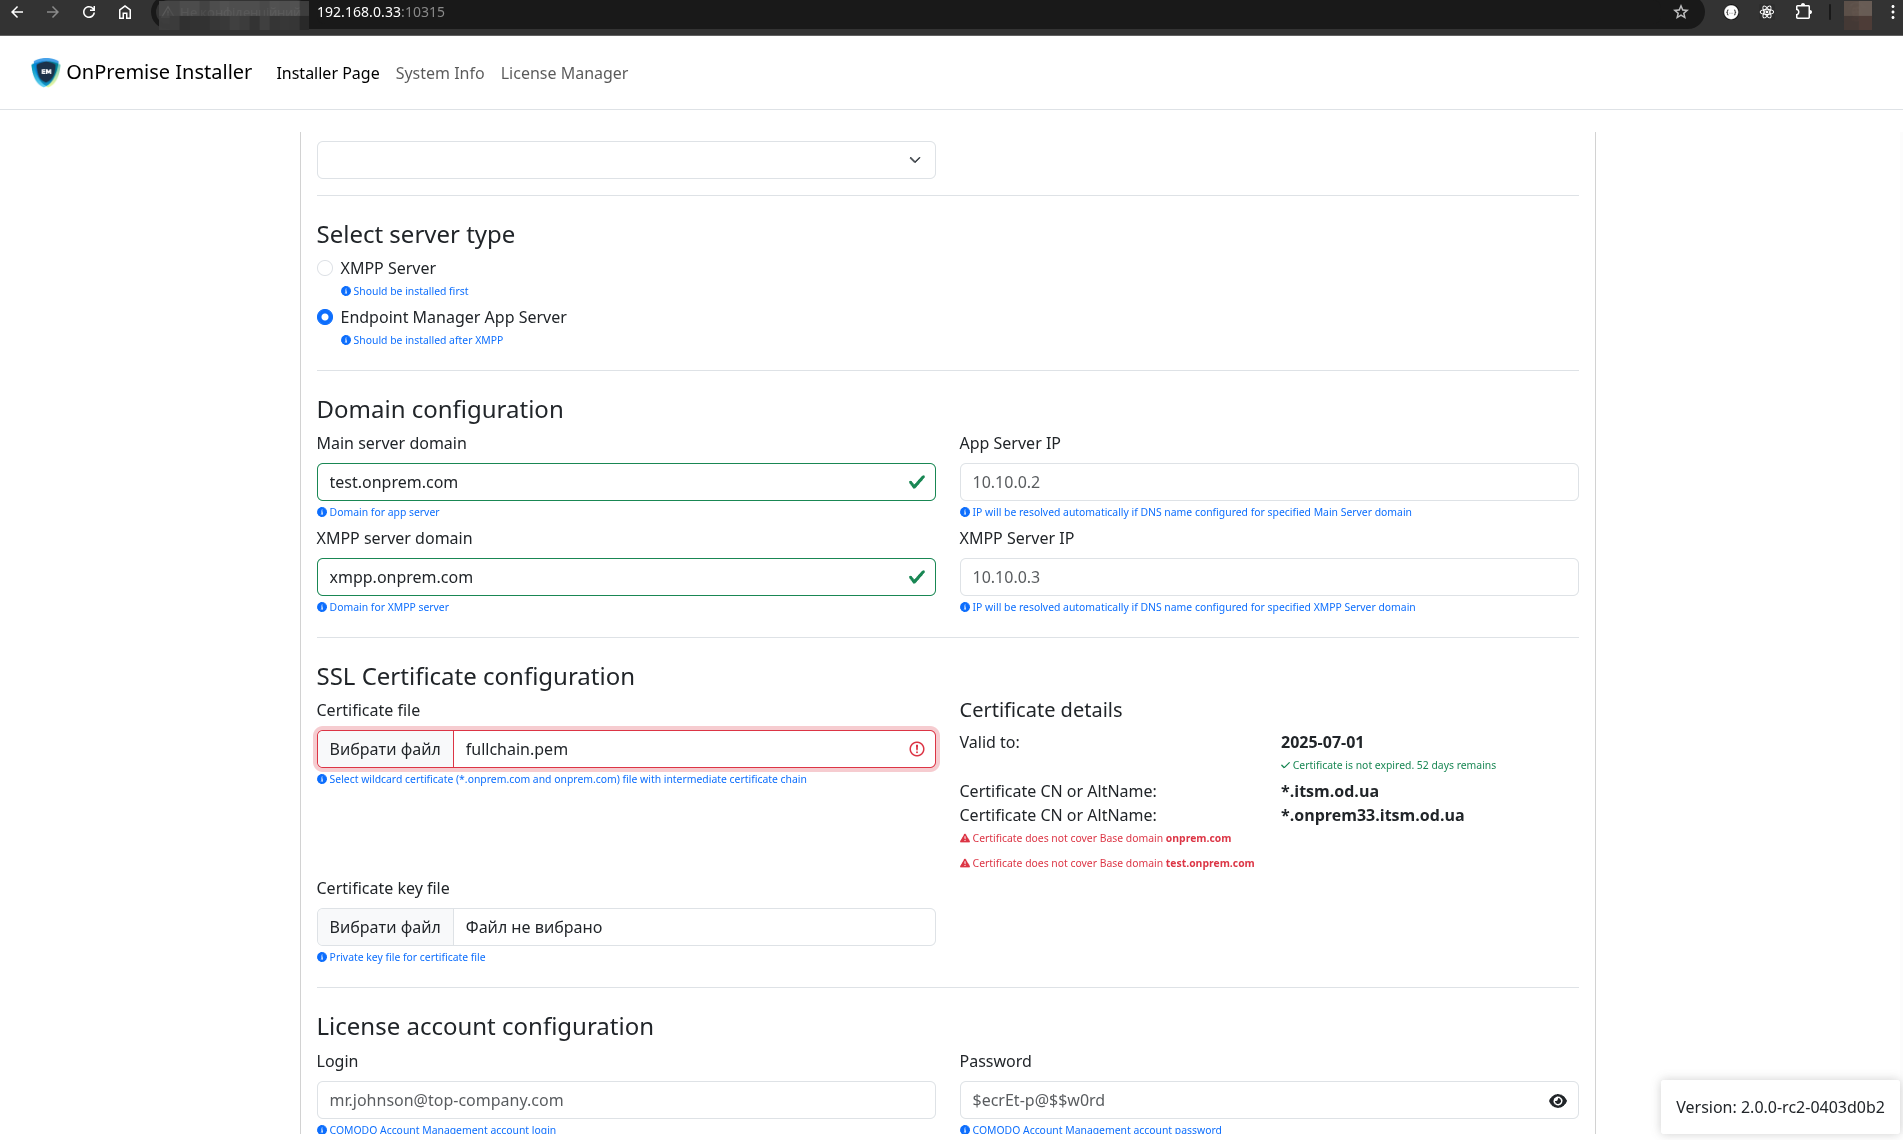
Configure installation
Click "Installer Page" on top-menu
Follow the instructions (Enter all necessary fields)
During installation next parts should be filled properly:
- Select server version
- Select server type (em / xmpp)
- Domain configuration
- SSL Certificate configuration
- License account configuration
Once all fields properly set - press Install button
NOTE: In case some errors occurred during installation - Install button become disappeared. Instead of this it needs to use Retry button. Retry perform tha same installation process, but reset failing state if such happened.
Fields are automatically validated. Once you started to enter into fields or when field leaved.
Green or red borders indicate where field validated successfully or not. In addition to field border indication some error messages can appear near that field to show the reason. In case of any errors - need to change appropriate value.
All data stored on server immediately on input field changed of focused out. It means that page reloads in browser are safe in most cases, and it is possible to continue configuration without necessity of re-enter data again.
Domain settings
IP fields will be automatically updated if domain can be resolved with DNS.
XMPP domain field will be filled automatically based on Main server domain. No need to change this value manually, however XMPP Server IP should be entered in case it couldn't be resolved with DNS
SSL Certificate configuration
Once certificate or cert key selected in field - it will be immediately uploaded to the sever and validated
Appropriate validation results will be shown near that fields
In case page will be reloaded it's not required to re-upload certificate again.
Upload certificate/key again in case previous uploading was with incorrect files -
Installation
Ones all fields were successfully filled and Install button pressed - Installation process begin.
During installation process for most actions will be shown information messages or errors
Wait until process ended. It can take up to 30-60 minutes for downloading docker images from the internet.
At the end - appropriate message will be shown. Press Continue button to finish installation
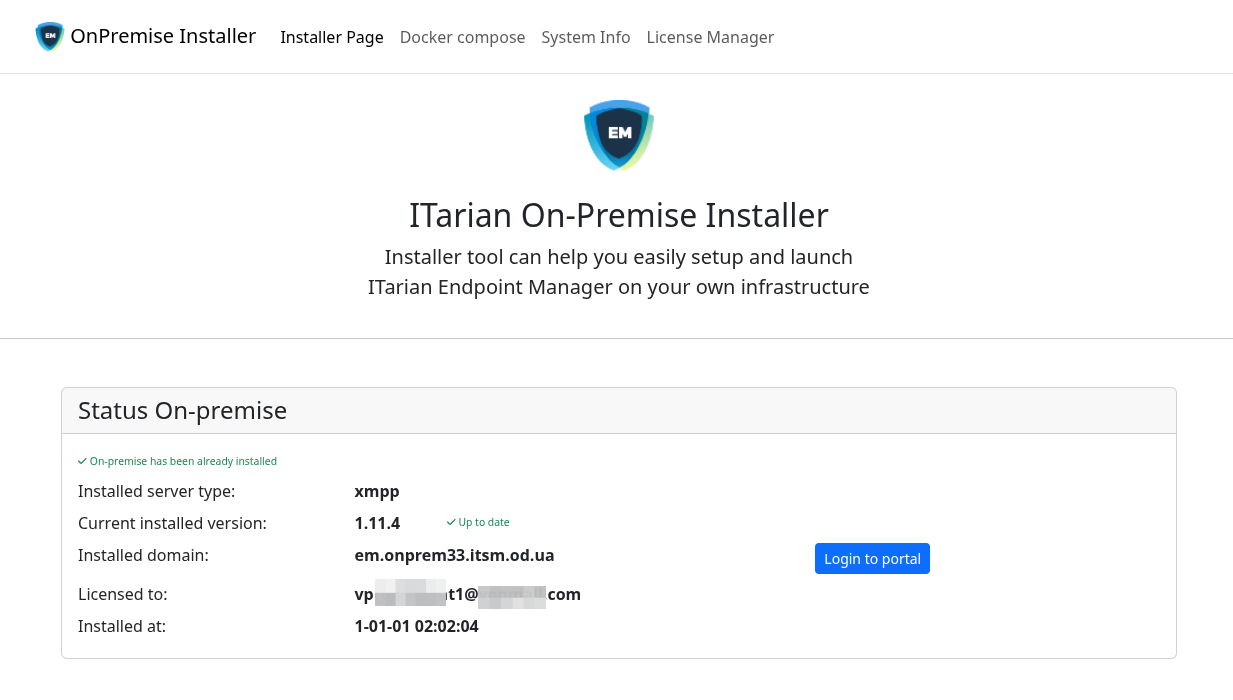
If server successfully installed - status page will be shown instead of configuration form
Updating
On-premise installer also gives a possibility to update on-premise application if installation was executed by installer (including installer v1).
In the status form it is possible to see current installed version
In case new version available - it'll be shown and Update button will appear in the Current installed version row
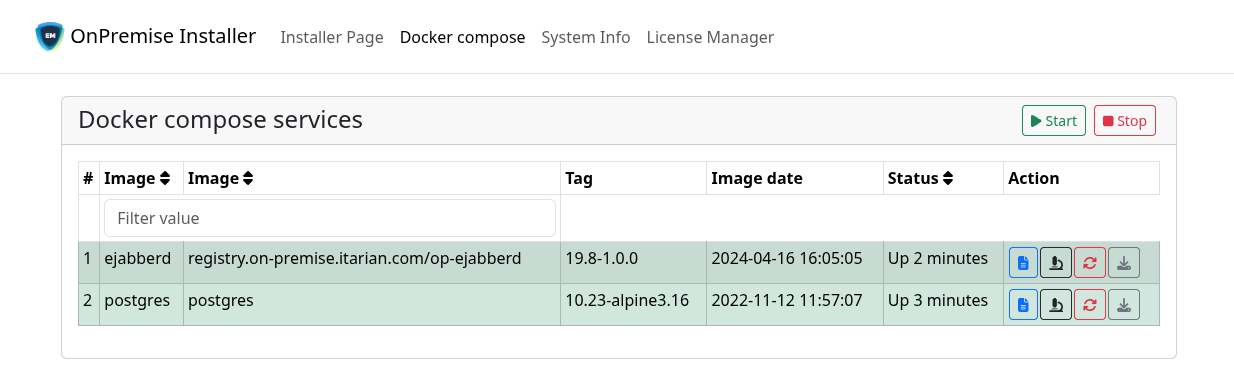
Docker compose troubleshooting
On-premise installer provides docker compose page to verify installation status and check container logs in case of some issues
Click "Docker compose" in top-menu
-
Docker compose file scanning
In case docker-compose file available it will show all services from it in the list.
If services not started - Status column will be empty and rows will have white background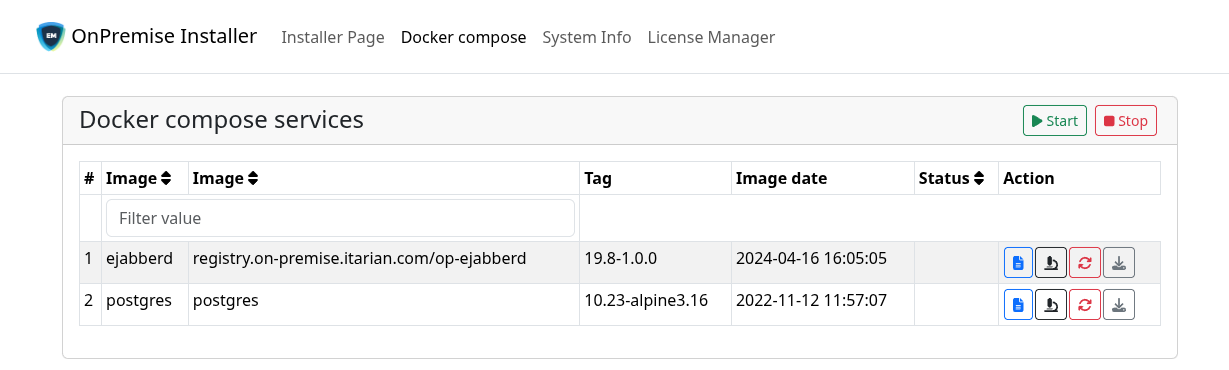
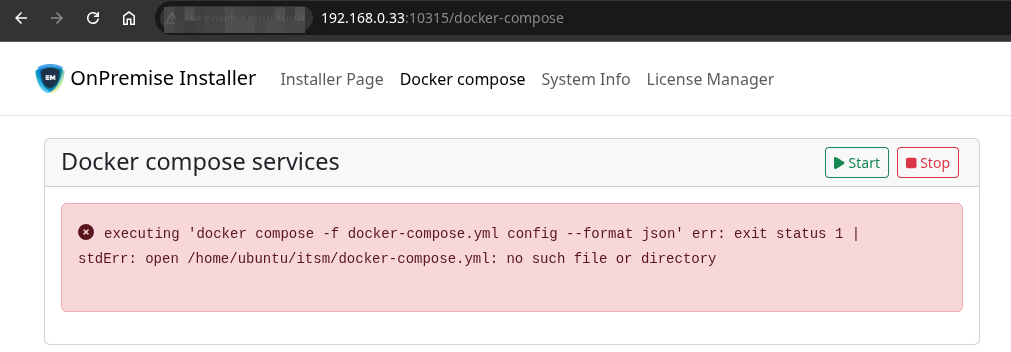
Until /home/USER/itsm/docker-compose.yml file absent - error will be shown
-
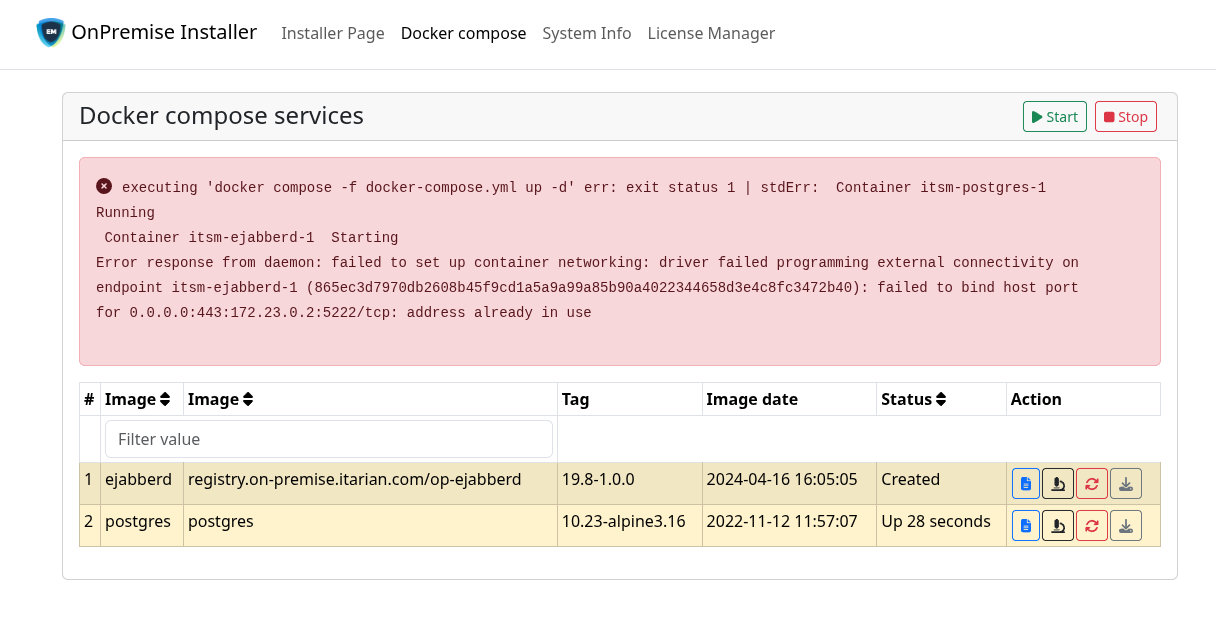
Docker compose service color indication to reflect service state
- White - service not started
- Yellow - service has been just started and run less than 2 minutes. It could indicate that service has problems and continue restarting forever.
- Green - service active and work properly or has exited with 0 status (which is by design)
- Red - service is in failure state. Need to check logs or inspect container to get additional info
In case service started with error - flash message appeared to indicate the reason
Normal service starting indication could look next

Successful running state